How to Connect Slack to N8N Workflows for Instant Automation (Step-by-step) Guide
Integrating Slack with your N8N workflows can transform the way you manage messages, automate responses, and streamline team communication. In this guide, we’ll walk you through connecting Slack to N8N, setting up triggers, and automating AI-powered replies in your workspace.
Step 1: Create Your Slack Workspace
Start by setting up a new Slack workspace. For this tutorial, we’ll use a basic setup:
Name your workspace and create your first channel.
Choose the free version of Slack to get started.
Once your workspace is ready, you’re prepared to add apps and create your own custom Slack app to connect with N8N.
Step 2: Build a Slack App
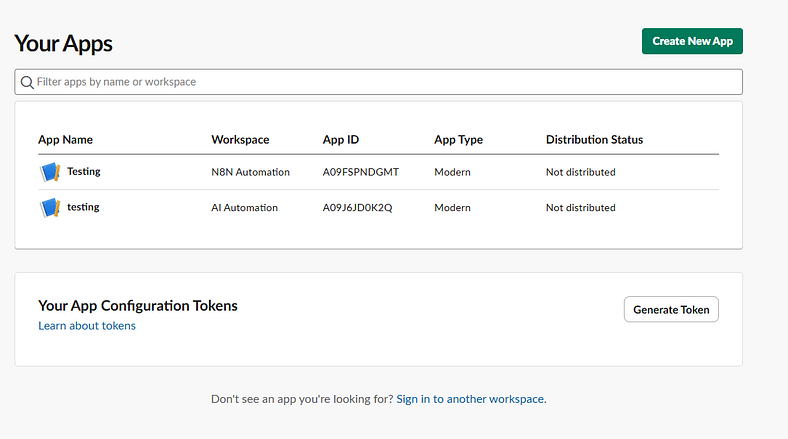
Navigate to Slack API and create a new app from scratch. Assign it to your workspace and give it a name that’s easy to identify. This app will serve two main purposes:
Step 3: Connect N8N via OAuth 2
In your N8N workflow, create a credential for your Slack app:
Click Connect my account using OAuth 2.
Review the permissions requested by N8N.
Click Allow to grant access.
At this point, N8N is authorized to interact with your Slack workspace.
Step 4: Configure Bot Permissions
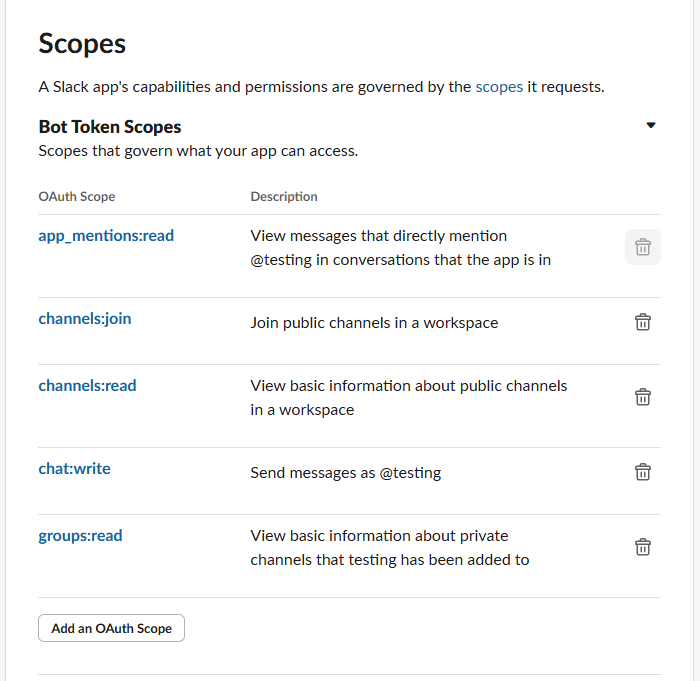
For N8N to fully interact with your Slack channels, you need to configure bot token scopes:
You can customize these scopes based on the actions you want your workflow to perform.
Step 5: Install Your App in Slack
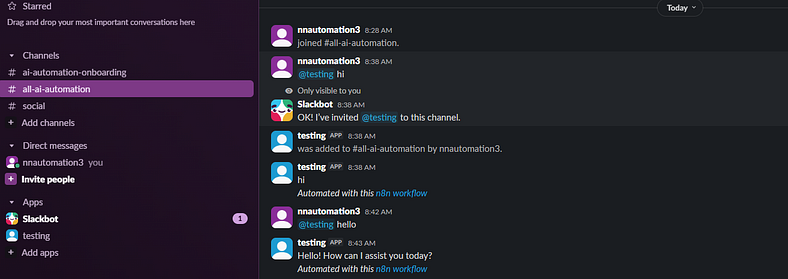
Once permissions are configured, install the app in your workspace. If your workflow can’t send messages yet, make sure to invite the bot to the channel where it should operate. For example:
/invite @YourAppName
After the bot joins, test sending a simple message from NAN to Slack to confirm connectivity.
Step 6: Set Up Workflow Triggers
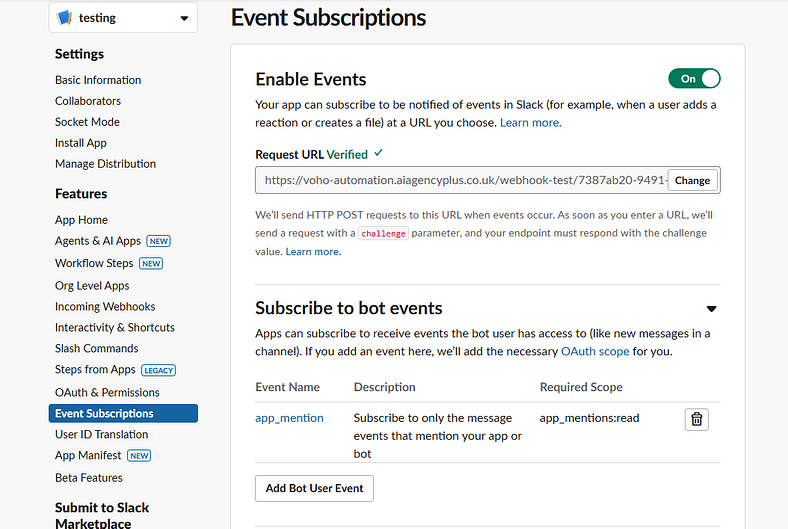
Next, configure your workflow to respond to Slack events using a webhook:
Copy the webhook URL from N8N.
Go to your Slack app’s Event Subscriptions and paste the webhook URL.
Enable Subscribe to Bot Events, and select app_mention.
This ensures that whenever someone mentions your bot in a Slack channel, it triggers the workflow.
Step 7: Integrate AI Responses
Now that the trigger is in place, you can feed messages into an AI agent in N8N:
Drag the text variable from the Slack trigger into the AI agent’s user message field.
Configure the AI to respond dynamically based on the input.
Send the AI’s output back to the Slack channel.
Step 8: Test Your Workflow
Finally, test the workflow end-to-end:
This real-time integration allows Slack to act as both the trigger and the endpoint for your N8N workflow.
Bonus Tips
By connecting Slack to NAN workflows, you can automate responses, route requests, and create AI-powered interactions — all within your favorite communication tool. Once set up, this integration can save hours of manual work and keep your team in sync effortlessly.